Yet another change is coming to your Google Calendar. But this one’s good!
In a message with subject line “New Google Calendar Feature,” Information Technology Services announced on April 13 that Google is changing the Appointment Slots feature to Appointment Schedules. If you have never used Appointment Slots, then the Appointment Schedules feature is on right now. If you have used Appointment Slots, you need to go into Settings to make the switch. In Settings, check the checkbox for Create appointment schedules instead of appointment slots to enable the new feature.

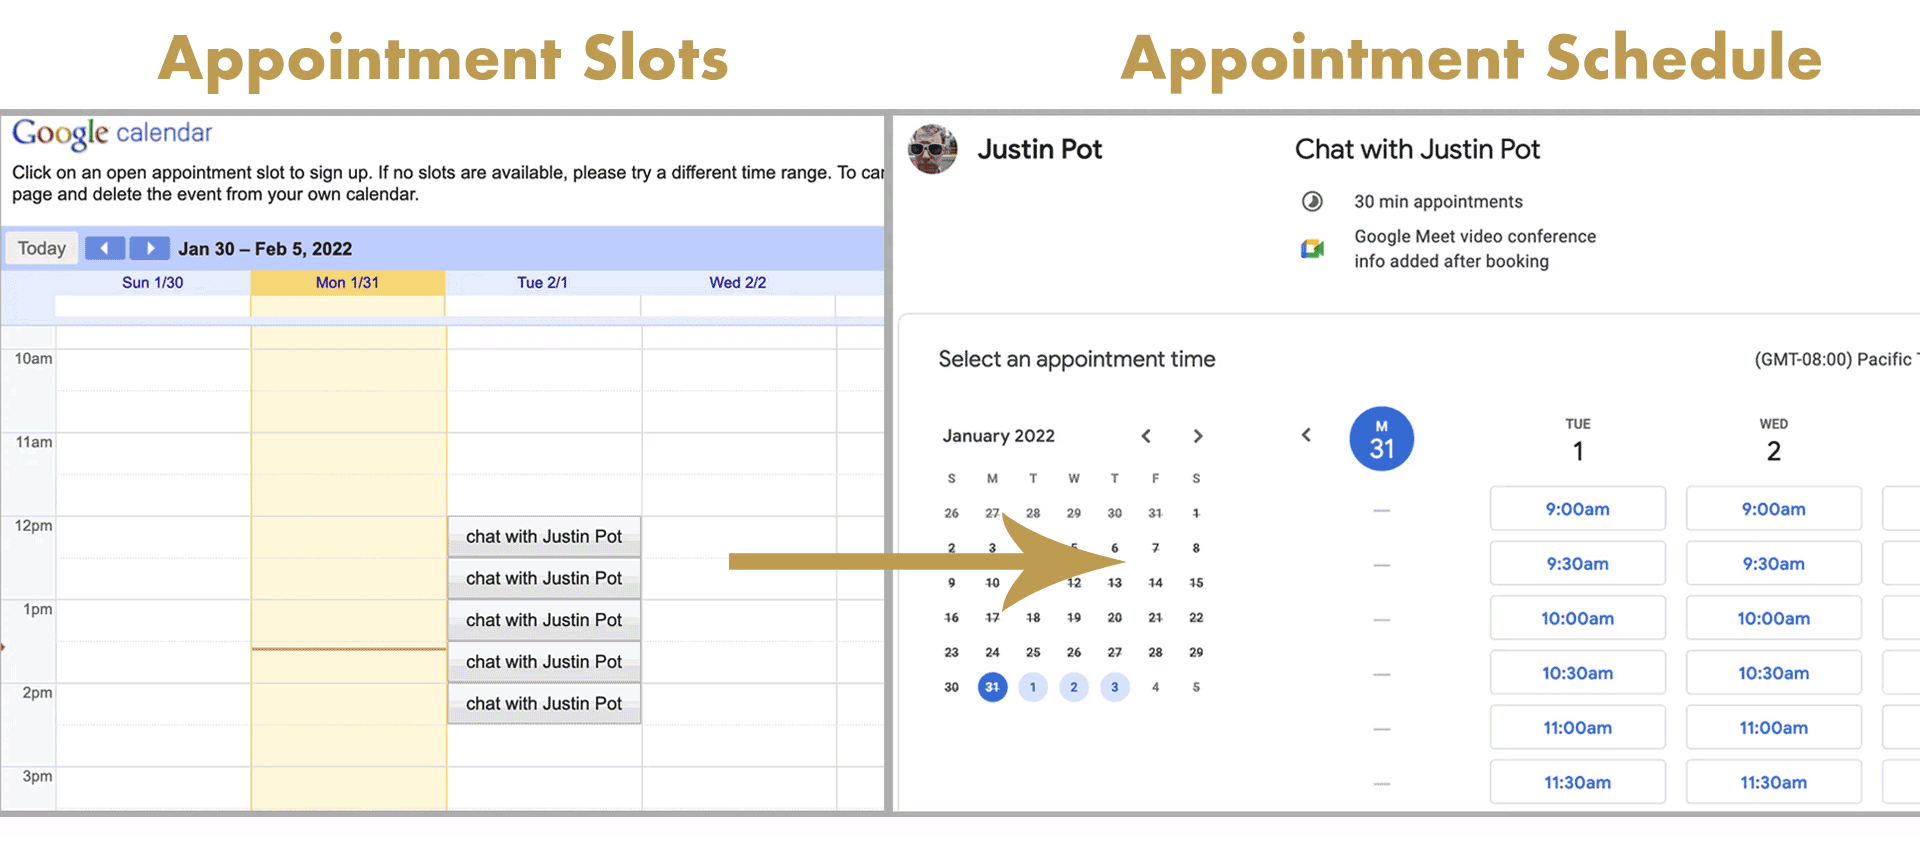
Slots will eventually be replaced with Schedules, so we recommend making the switch at the time you choose, and giving yourself a few minutes to get familiar with the changes. Once you enable Appointment Schedules, here is what it looks like:


In this example appointment I’m setting up office hours to meet with me for 30 minutes. I can select the hours I am available during the week and set the event to repeat weekly.
There are several options to limit the date range of when your time can be scheduled. What I like best is setting a maximum advance time that an appointment can be booked. I don’t want students scheduling me 3 months out – this is an “I need your help soon” kind of situation, so I set the limit at 15 days.
I also like that you can set a minimum time a person must book before the appointment starts. I gave myself a 2 hour notice. Realistically I’d make this more like 15 minutes, but the idea is that it gives you time to prepare instead of allowing someone to book an appointment that starts in 5 minutes.


Other options I like:
- giving yourself buffer time between appointments.
- putting a limit on the number of appointments that can be booked in a single day. If back-to-back appointments during your 2-hour window would leave you stressed and frazzled, you can take fewer appointments.
- location choice. You can give an in-person location, choose video conferencing with Meet, ask the student to provide a phone number for you to call, or you can choose to update the location manually after a meeting has been booked.

You can add multiple custom fields. For example, I’ve added a request that the student let me know what they want to get out of the meeting so I can be ready to help them. You could also ask what assignment the meeting is about or what type of feedback they want. These custom items can be required or optional.
After you click okay your appointment schedule appears in your calendar, and you’ll see when new meetings are booked. You’ll also get an email letting you know someone has made an appointment. If you can’t avoid scheduling another event during the appointment schedule hours, go ahead and put it on your calendar. The appointment schedule feature won’t book an appointment during a time you’re busy.

If something comes up, like a doctor visit, you can remove an open appointment time. Since it’s a recurring event (in my example), Calendar offers to delete the appointment schedules for the current week, every week, or delete the entire schedule.
Calendar provides a booking page so you can send students the web address. They’ll see only your availability for the Appointment Schedule times you set up, and be able to choose a time. Here’s what it looks like:


When a student clicks a time to schedule an appointment, they fill out a booking form. It shows the time they selected followed by a request for their first and last name, email address, and any other custom fields you added. After filling in all required fields, the student can book the appointment and it will be added to both your calendars. If you selected reminder emails, the student will get a reminder at the time you specified (I picked one hour before the meeting).
And that’s it. Appointment Schedules are very similar to Appointment Slots, but I love the new features that have been added to give you a little more control over how booking works, especially the custom questions that you can add.
One thing I couldn’t do was select Webex or Zoom as the videoconferencing tool. I could only choose Meet. I did not try the option to add a location after the meeting was booked, but I think if you did that, you would be able to add Webex or Zoom if you have connected one of those services to your Google Calendar.
If you would like to play with this feature in advance of offering an Appointment Schedule to your students, I would be happy to help you experiment or book and cancel an appointment so you can get familiar with how everything works. You can put an appointment on my calendar at my booking page: https://calendly.com/cherylcolan (this uses a different service to give you the choice of Meet, Webex, or Zoom).